For the purposes of this tutorial, we will be creating an "isometric" view sprite. I choose isometric because it's one of the more difficult, and if you can master this, you can easily create top/down, or straight-on sprites.
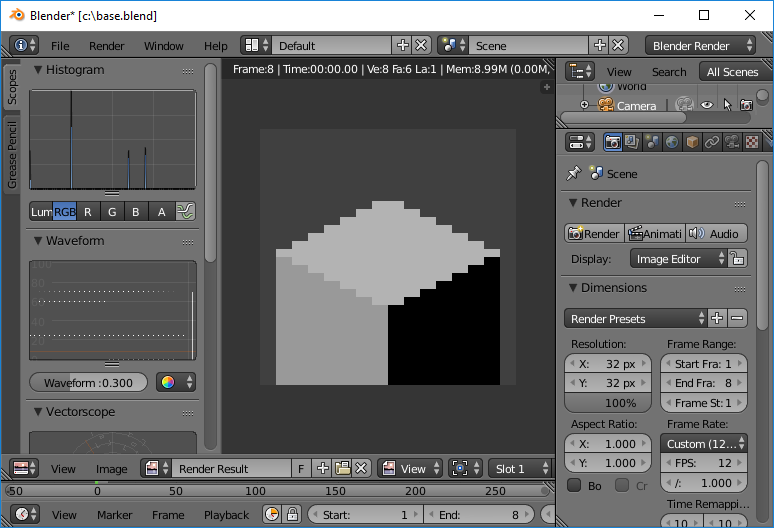
The most popular isometric 2D tile design is the "60 degree" tile. This is to say that the camera is "tilted down" at 60 degrees on the X axis (in blender). At this angle, it's possible to create your sprites by hand by drawing two pixels on the horizontal axis for every one pixel on the vertical axis. To illustrate this, look at this "tile" sprite here:
![]()
So starting from the left corner, for each two pixels it moves to the right, it goes one pixel up (or down) until it gets to the middle. The same happens coming from the right, to create a "diamond" shape that is our isometric tile.
This always results (if you make your sprite a "power of two" such as how this one is 16x16) in two pixels "sticking out" on the right and left, and a four pixel "line" at the top and bottom. This enables the tiles to perfectly align so there is not a single pixel wasted. When you have your tile "top" looking like this, you'll know your angles and "zoom" levels are set correctly.
So now, with the "4 on top, two on the sides" design of the tile, you can see how perfectly the tiles fit together:

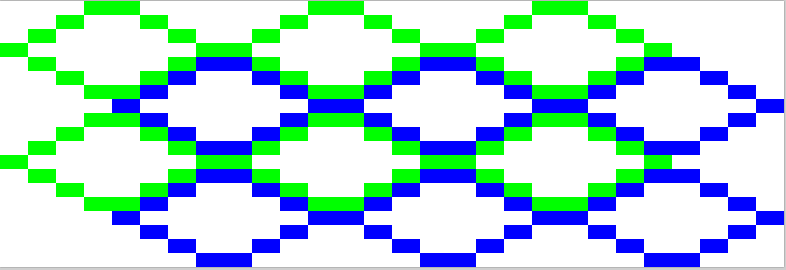
Regardless of whether your tiles are 16 pixels wide, or 128 pixels wide, these same rules still apply. You want the "top" and "bottom" of your isometric "tile" to have exactly 4 pixels, and the points at the "right" and "left" of the "tile" will need a point that is exactly two pixels wide.
So now that whe know exactly what we're looking for in a tile, we can move on to using Blender to create our tiles.
Our first step is to set up a "rig" that will generate sprites correctly every time, then we'll use this rig repeatedly in the future by making a copy of it for each new sprite we want.
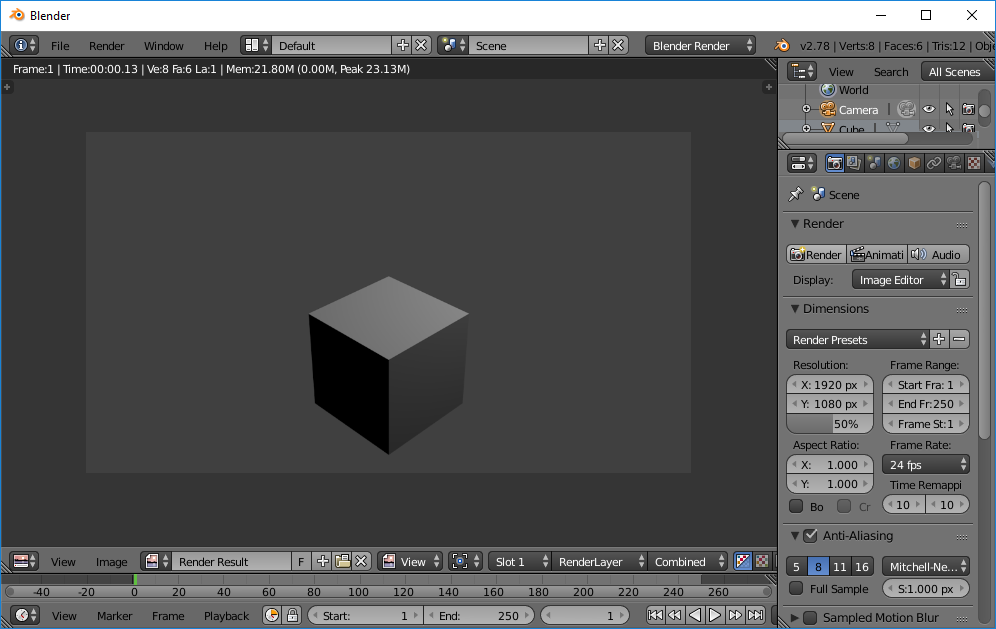
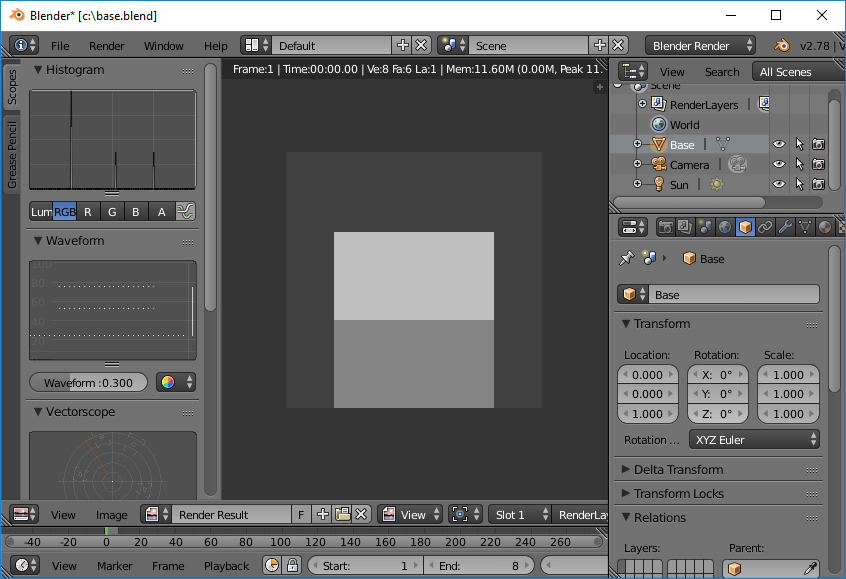
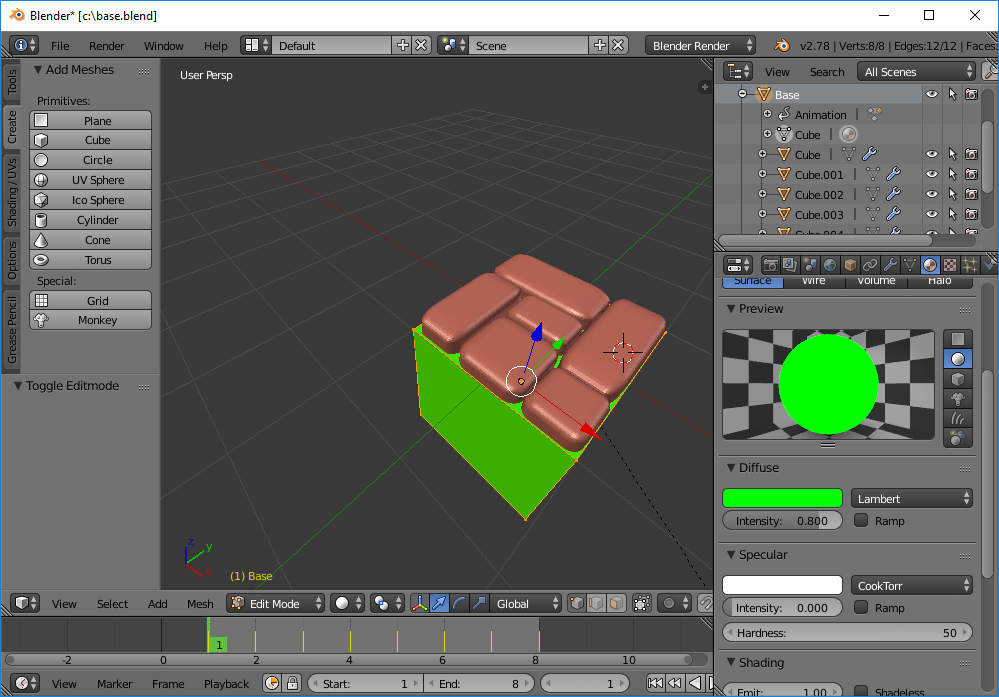
Start by opening Blender to the default layout. If you don't use the default layout, you'll need to create a scene with a cube in it. The size/scale of the cube isn't particularly important, but you will have to make adjustments in your own view based on the scale if you don't use the default cube. Throughout this tutorial, I'm going to assume you know how to do the basics in blender (move / rotate an object).
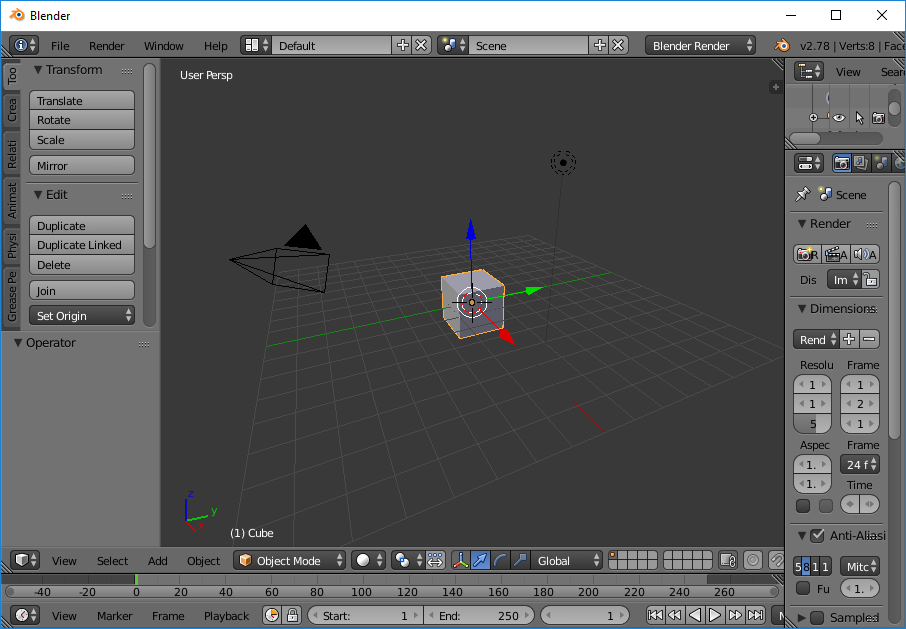
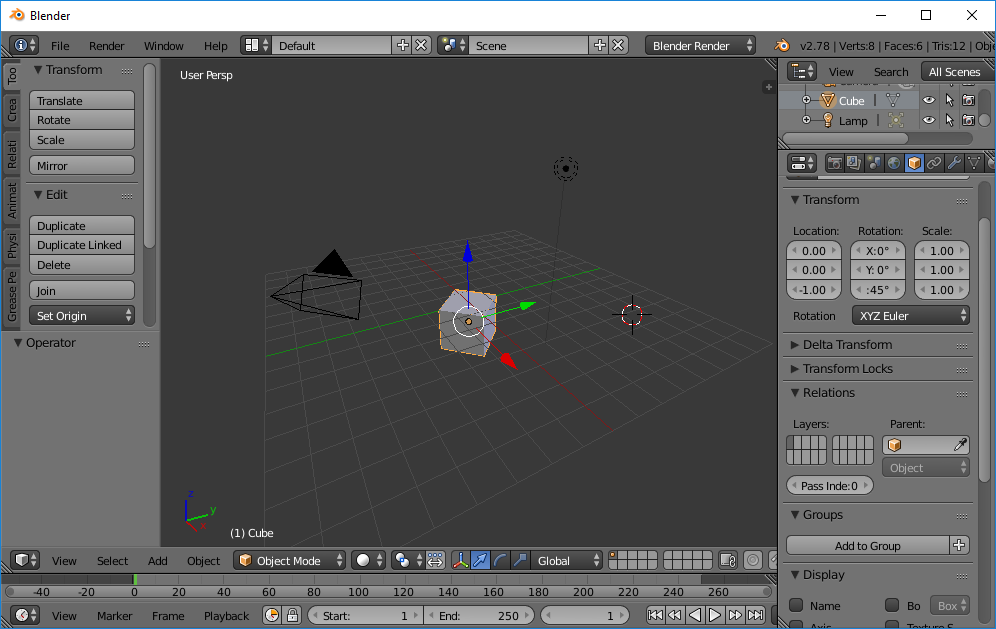
This cube is going to be our "base". It will exist, even if it's hidden, for every sprite we make. For now, drop it down so the top face is at the 0 plane, level with the grid. (By default this just means setting the cube's Z value to -1.) We will consider this "ground level." Additionally, to make sure everything is rigged up correctly, we'll need to turn it by 45 degrees on the Z axis. (If it's not clear why right now, it will be in the next step.)
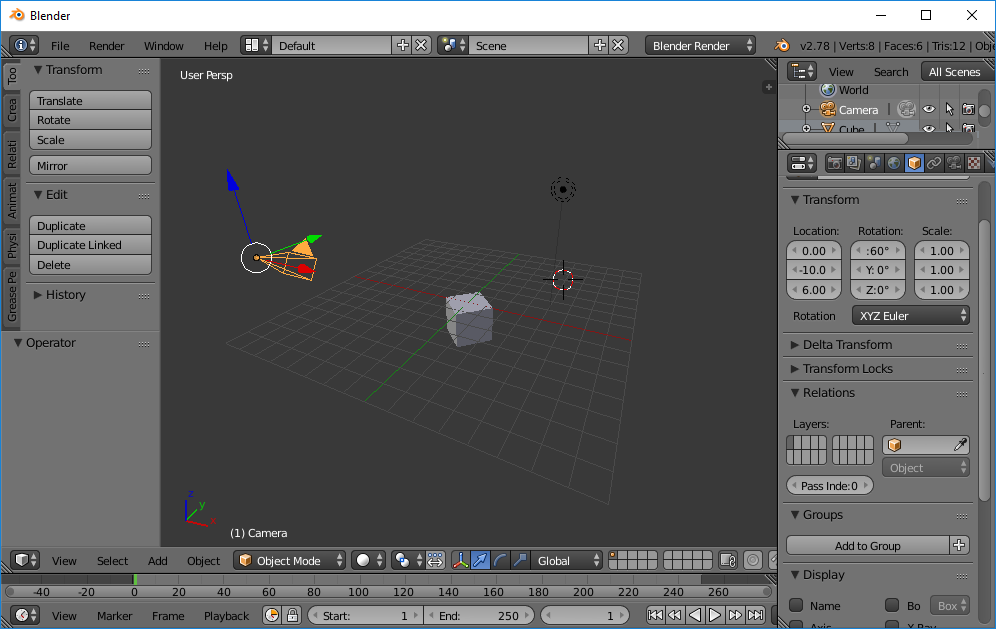
Next we need the camera to be in the correct position. When using an isometric camera, we will be removing the "perspective", which is what makes things in the distance look smaller than things up front. This is called "orthographic" view. Because perspective is gone, it won't really matter where we put the camera, so long as it's at the 60 degree angle needed for isometric view, and is "looking at" the origin (0,0,0). Unfortunately there's no nice round numbers that will get us there, so I like to use a "close enough" approach here, and then we'll adjust later. So start by setting your camera's location to (0, -10, 6), and then tilting the camera down to look close to the origin by setting the rotation to (60,0,0). Your scene should look something like this:
For the rest of these settings, pay close attention to the changes we're going to be making in the toolbox on the right.
If you select the "Camera" icon, and click "render" at this point, you'll see that only we're already in the neighborhood of our isometric view. Unfortunately, our cube still looks like a regular old 3D cube. Let's pixellate it!
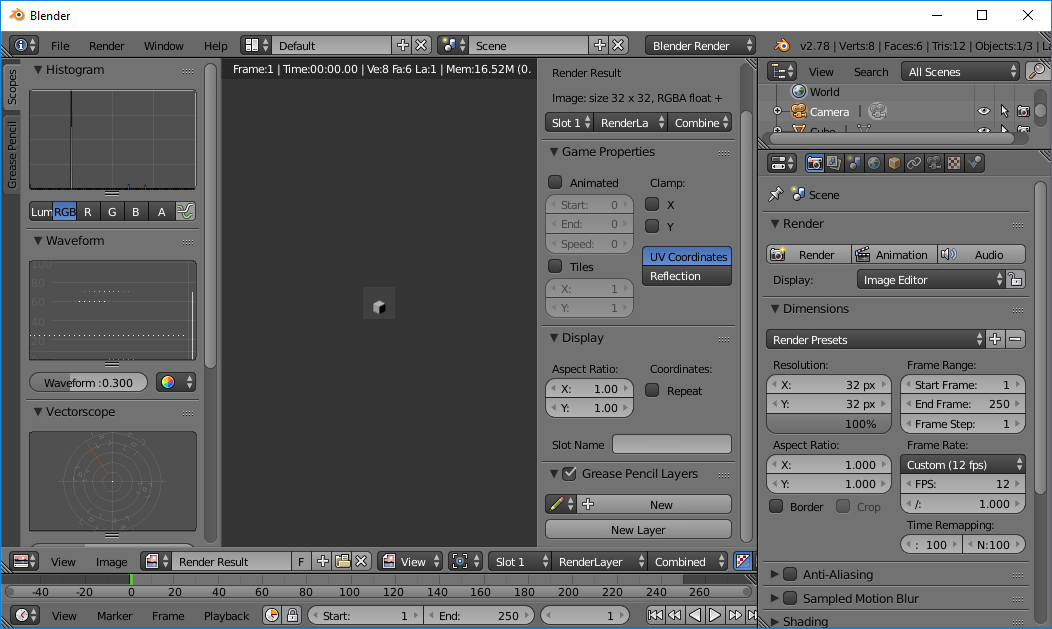
Our first step is to figure out what dimensions we want our tiles to be. I always recommend going with something square, and getting the top of your tile just below the "top" of the screen to give you a little wiggle room for overlapping pixels (such as blades of grass, or pebbles or something). So let's start by making our texture a small 32x32 pixel texture. Go to the camera's "dimension" settings, and set the resolution to 32 x 32 pixels. Make sure you also set it to 100%, as it will default to 50%. While we're here, now's a good time to also change the FPS to 12, which is a standard frame rate for stop motion, and looks good with pixellated graphics. If you really want smooth graphics, sure, you could crank that up to 30 or so, but I'd consider it wasted image space. 12 FPS is plenty for a pixel-based animation. And since we're here anyway, set the "End Frame" to 8, as this will come into play later.
Press F12 to render the scene (you'll be using this a lot) and you'll see everything shrinks appropriately.
Use the mouse wheel to scroll in and see what your sprite currently looks like.

A tad blurry, no? Here you'll have to change how blender is set up to render previews. Open the Blender user preferences (Ctrl+Alt+U) and find the "Images Draw Method" section (you'll need to scroll down.) It will be defaulted to "2D Textures".
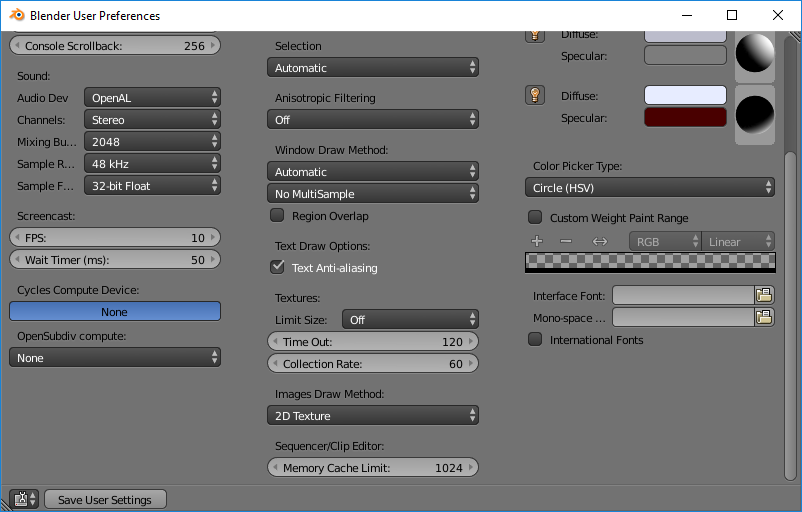
Change this to "DrawPixels.

You should immediately see your render go to the glorious pixellated look we're going for.
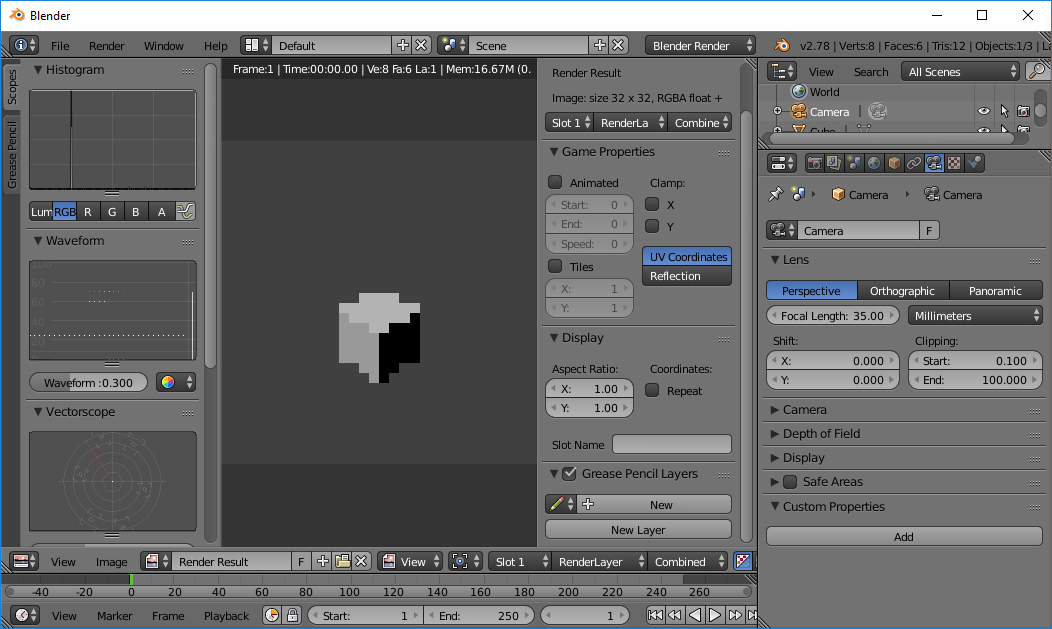
Still, it's a bit wonky. Our camera is still in perspective mode and it's too far away so we don't have that iso tile pattern (4 pixels on top and bottom, 2 pixels on right and left) that we're looking for. Now is also a good time to fix the lighting. Start by deleting the default "lamp" that comes with the scene, because lamps have "falloff" which won't make our lighting look right. Place one or more "sun" objects into the scene, and adjust their angles so you get the lighting you're looking for. Now, select the camera, and go to the icon that looks like a video camera. Here, we want to select "Orthographic" to get rid of the perspective, and this is where you'll adjust the "y - shift" and the "orthographic scale" in order to get that perfect tile look you're going for. I mean, I could let you try and just "figure it out" (which you'll have to do each time you change the resolution of your sprite) but for a 32x32 sprite, the "orthographic scale" seems to work best at 3.150, and to place the center of the top of your tile at one pixel above the "center" of the sprite, I'd suggest setting your y-shift to 0.078. These are the two numbers you'll have to fiddle with in the future to get things looking right.
You should see that we now have that perfect "tile" design we're looking for with 4 pixels at the top and bottom, and two pixels on the right and left.
|
Note: Reddit user ThomasTC math'd the shit out of this for us, so now you can get the camera put exactly where it needs to be every time without "fiddling" with it: For starters, don't use a Z value of 6 for the location of the camera, use 5.7735. Next, the "Y shift" of the camera shouldn't be 0.078, but rather should be "half a pixel" (to make sure that you get a single pixel height for the left/right corners) which you calculate with this formula: 1 / height * 0.5. (So in this case, it would be 0.015625.) Shift the whole image up/down by just adding or subtracting the "full value" of a pixel. Finally, your orthographic scale should be set to (2 * √2). In other words, 2.82843. If you wish to scale it down a little to add a couple pixels on the side (like I did) then you multiply THAT amount by width / width-pixels. So since my width is 32, and I want to "reduce" it by 4 pixels (leaving a 2 pixel gap on each side) it's going to be 2.82843 * 32 / 28. In other words: 3.23249. Using these formulas, we can now get everything set up exactly right each time with no fiddling necessary! Thanks ThomasTC! |
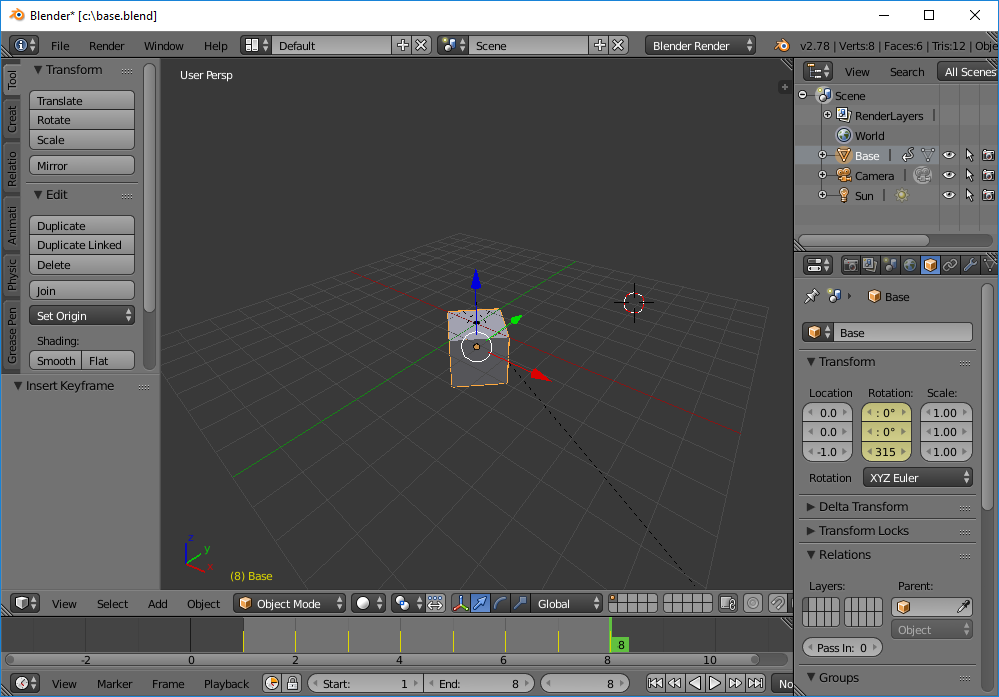
As a test, set the rotation of your cube "base" back to 0 rotation (may as well rename it to "base" at this point) and render again. You should get something that looks like this:
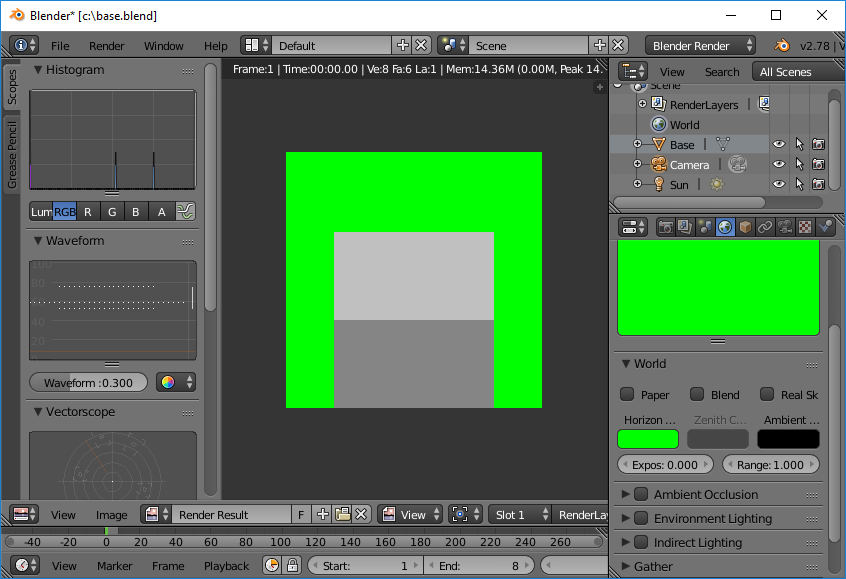
We're almost done with our "Static" object base. First, we want the "background" to be transparent. There's a lot of different ways to do this, but the one that's easiest on the eyes (since I tend to use a color that's painful to look at) is to click on the little "globe" (world) setting icon, and change the "horizon" color to a color that you wish to use as the background. This "horizon" will only show up when you're rendering so you don't have to stare at it and burn your retinas while you're staging your sprites.
The last step is to select each frame (of the 8 frames you set earlier) and set the "Base" cube's "transform" so the Z rotation is appropriate. That's to say 0 for frame 1, 45 for frame 2, 90 for frame 3, etc. until frame 8 is rotated to 315. Each frame, obviously, will need a keyframe. This is where I'm going to assume you know how to do basic animation. Save your "StaticPixelBaseRig.blend" file (or whatever you want to call it) and we're done! Let's look at how to use it next!
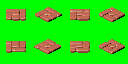
This one is going to be pretty easy. Let's assume we want to make a brick path, but to make things interesting, the bricks are different shapes. For our "brick" we'll just use a basic red cube, smooth the edges a bit, and attach it to the "base." Note that each time you bring a new object into the scene, you need to drag the object (in the hierarchy view) onto the "base" so the "base" becomes its parent.

Now, as the animation renders, the object will keep its rotation, rotating the 45 degrees to give you a "view" of each side. Let's round off this "brick" and apply a reddish material to it that has some shininess to it.
Add a few more "bricks" to my tile, and then the last trick is to change the material for the "base" to have a full "emissive", no "specular", and have the "diffuse" be the same color as my transparent background. This will make the base "disappear" while the fancy new brick tile remains. Notice that I put VERY LITTLE detail into this sprite. No fancy textures, no detailed bumpmapping, nothing. With the low resolution of the sprites that I'm making, all of that detail would just be lost in the noise. When creating your sprites, consider making the "silhouette" interesting, and don't concern yourself with details.
Now render the full animation.
Check the output folder (default C:\tmp) and you'll see that your rendered sprites have been placed in individual files.
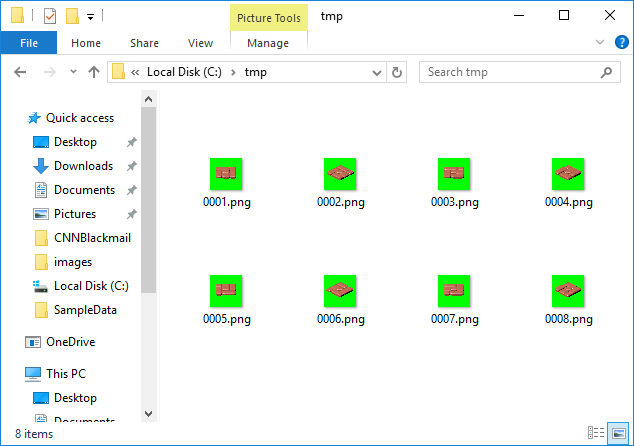
All you have to do is open the first sprite in Aseprite, and it will automatically detect that it can import the entire numbered sequence and create a single sprite with it. Allow it to do so, then just turn around and export your fancy new sprite sheet.
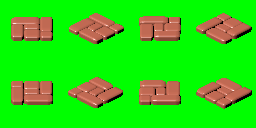
And the same spritesheet made in 64 x 64 pixels with only minor modifications to the setup:
It took a lot of set-up to get here, sure, but now that you have your basic rig, cranking out sprites based on 3D models is a cinch! Even when it comes to animated sprites!
<To Do>
© 2017 Javin-Inc.com / PeculiarHabit.com